Video How To: Set Up a Backpacking Dome Tent
Seth from Next Adventure demonstrates the right way to set up a backpacking tent to keep you sheltered, warm, and dry on your next outing.
SHOP TENTS
- Hello,
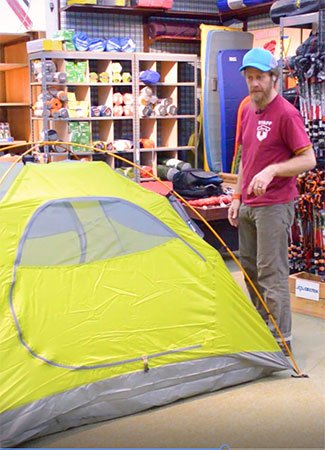
Welcome to the Next Adventure how-to's. My name is Seth & today we're going to talk about how to set up a two-person dome tent.
The tent that we'll be using today is a two-person dome tent from the Wilderness Technology product company, the North Duo tent. Right when we open the bag we've got the directions sewn right into the bag with all the parts and the pieces. There's my tent body, there's gonna be my fly, my tent poles, and my stakes.
When I get to a campsite the first thing I do is clear a space out. Make sure that's going to be big enough for my tent to go up. I'm going to be careful of rocks & loose sharp items that might puncture the tent. One of the first things I would do outside, which will be difficult to reproduce inside, would be to take four tent stakes and put them in each corner of the tent, therefore, securing the tent in place for ease of the rest of the build and to prevent it blowing away on a windy day. So, I put the stake in at a good 45-degree angle. I push it in and I try to sink them in with my hand.
Tent poles will be put together in a big X fashion. Please remember while setting up your tent poles to be wary and careful of anyone who may be around you. We'll take one and lay it across the tent corner-to-corner, we'll assemble the second, one making sure that all the parts and pieces slide together smoothly. Make sure that as you're setting it up this part of the tentpole looks clean & relatively shiny.
Start by taking one end of the tent pole and insert it into the grommet, and again, if I was really outside this would be staked in. From one tent corner, I'm going to go to the exact opposite corner, lifting that tent pole up and inserting it into my corner. Lay that first tent pole down then I can insert what would end up being the third end into one of my corners. I'm going to come over here and I'm going to connect the last corner to the fourth, pushing those ten poles up simultaneously. What I'm looking for eventually is to have them crossing in the middle. From that point, I get to clip the tent and then it will be self-standing. We'll begin to suspend them, I prefer to start in the middle of the tent, it puts everything under nice equal tension & it gets my poles balanced. Clipping all the way down, making sure that they're all on there. It will really help the strength and give you more space inside when you make sure that you use all of them.
So, there's the start to our normal tent. At this point I could still sleep in it, enjoy the breeze, I'd only have to watch out for the rain. The rain fly is going to be the last part that we put on, it's also one of the more important parts that keeps us weather protected. It will add a lot of wind resistance and keep us a little bit warmer. Go ahead and throw the rain fly right over the tent, get it all on there. It's important to make sure that I've got my doors lined up over the areas that need doors and all of my corners will line up accordingly. We're going to attach the tent rain fly to the tent body, working my way around to make sure that I get all four. Doing that last one there's usually a little bit more tension. It's okay, we want the rain fly to be under a bit of tension that way it sheds water better. Outside, we want to make sure that we can put a tent stake into the vestibule, to be pulled away allowing dry storage underneath this area.
If the rain fly fabric itself is touching the tent body, where the two fabrics meet some moisture can sometimes be pulled through. We don't want that. We like to have our tent rain fly pulled away, allowing rain to come off and away from the tent. What I'm looking to have is enough airflow to literally get a hand all the way through there, what that will do is promote air circulation to get out some of these roof vents.
A lot of tents will have additional guy points on the side of the tent fly and we use those to pull the tent fly away from the tent body, therefore creating that double wall & that airflow. This is a little friction device. As I slide my cord through I can increase the tension and it will lock in place, pulling some of that away. So, by shedding that rainwater away, it prevents it from going under the tent and making a big puddle under there.
So that was a quick tutorial on how to set up a basic two-person dome tent. There are a lot of tents out there, if you have questions come visit us down at Next Adventure. We're happy to help.